Hey everyone, I hope you are having an incredible day today. Today, I will show you a way to make a tasty dish, no-bake cheesecake. It is one of my favorites food recipes. For mine, I am going to make it a little bit unique. This will be really delicious.
No-Bake Cheesecake is one of the most popular of current trending meals in the world. It is appreciated by millions every day. It’s simple, it’s quick, it tastes delicious. No-Bake Cheesecake is something which I have loved my whole life. They’re fine and they look wonderful.
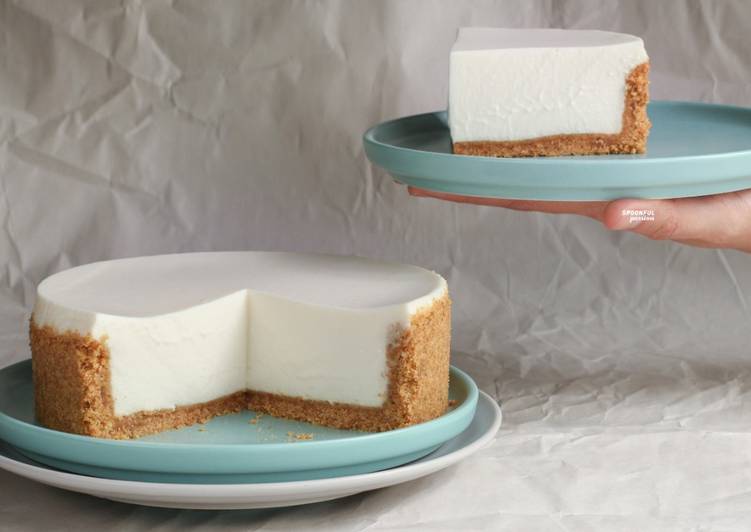
Instead of standing in a hot kitchen, make this simple recipe for your next warm-weather gathering. This easy No Bake Cheesecake Recipe is hands down the best! A smooth dessert with fluffy, almost mousse-like filling and a buttery graham cracker crust.
To get started with this particular recipe, we have to first prepare a few ingredients. You can cook no-bake cheesecake using 12 ingredients and 11 steps. Here is how you can achieve that.
The ingredients needed to make No-Bake Cheesecake:
- Get Crust base
- Make ready 110 g (1 cup) graham cracker or digestive biscuit
- Get 60 g (1/4 cup) unsalted butter, melted
- Prepare 36 g (3 tbsp) brown sugar, optional
- Make ready Cheesecake
- Take 35 g (2 tbsp+1 tsp) water
- Take 4 g (1 1/4 tsp) gelatin powder
- Take 150 g (5.3 oz) cream cheese, room temperature
- Take 50 g (1/4 cup) granulated sugar
- Prepare 10 g (2 tsp) lemon juice, optional
- Make ready 60 g (1/4 cup) plain yogurt
- Get 150 g (1/2 cup+2 tbsp) whipping cream
A no-bake cheesecake takes all the stress away. Plus, it takes about half the time to make. Our classic cheesecake requires flour and eggs which helps set the cheesecake as it bakes. Check out this No-Bake Nutella Cheesecake, these No Bake Haystacks, or this Red Velvet No Bake Cheesecake.
Steps to make No-Bake Cheesecake:
- Youtu.be/xpxJWbWrqwM
- Crust base: Crush the biscuit into fine crumbs using a food processor. Or seal them in a Ziploc plastic bag and roll them with a rolling pin. Transfer to a bowl. Combine well with butter and sugar (if using).
- Transfer 1/3 of the mixture into a 15 cm cake mold. Spread evenly before using the bottom of a glass to press the mixture onto the base. Pack it down as much as possible.
- With the glass sitting on the crust center, spread the remaining crumbs around the cake perimeter. Move the glass to pack the surrounding crumbs as even and tight. Refrigerate while you prepare the filling.
- Cheesecake: Sprinkle gelatin evenly onto the water. Let it sit for at least 5 minutes to bloom.
- In a medium bowl, smoothen the cream cheese with a rubber spatula until creamy. Mix in sugar. Then add lemon juice (if using) and yoghurt. Mix until the mixture becomes really smooth.
- In a cold bowl, whip the cream until thick and creamy with a cold whisk. Cold equipment will speed up the whipping process.
- Fold the whipped cream into cheese mixture.
- Melt the bloomed gelatin in a microwave or bain-marie. Heat just until it is fully dissolved. Combine well with the cheese mixture.
- Pour mixture into prepared crust base. Spread and smoothen the top with an offset spatula.
- Cover and refrigerate for at least 6 hours or best overnight. The cake will set better when chilled longer. To remove the cake ring, wrap the sides with a hot wet towel until it loosens up. Then, slice and enjoy!
I think that no-bake cheesecake was the very first kind of cheesecake I ever made. So what exactly is a no-bake cheesecake? Simply put it's a cheesecake that's never seen the inside of an oven. Neither the crust nor the filling is baked, making it truly a no-bake dessert. No Bake Cheesecake Recipe & Video.
So that’s going to wrap it up for this exceptional food no-bake cheesecake recipe. Thanks so much for reading. I am sure you will make this at home. There’s gonna be more interesting food at home recipes coming up. Remember to save this page on your browser, and share it to your loved ones, friends and colleague. Thank you for reading. Go on get cooking!